


Have you ever wondered how to find any domain name information? I think you did! and it’s pretty easy to google it in seconds to find a bunch of websites that offer domain name information, but in this article, we’re going to create our own NodeJs and ExpressJs API that will return us the info of any given domain name.
The structure of our API will have an apiController that has a getDomainInfo method, an apiRoute, and the entry point of our API which is server.js–This is just how I like to organize my code, otherwise, you can write all the logic in one file, but I don’t recommend it:)
Sound exciting enough? so Let’s get right into it!
The project folder structure:
domain_checker_api/
  |- node_modules/
  |- .env
  |- routes/
  |    |- apiRoute.js
  |- controllers/
  |    |- apiController.js
  |- package.json
  |- package-lock.json
  |- server.js
If you want to follow up make sure to have NodeJs installed on your machine, or you can install it from here.
So the first step is to install some dependencies express , dotenv and whois-json
In your terminal run:
npm install express whois-json dotenv
In our server.js file let’s set up our Express server:
First, we require express module and create an express app instance using the express( ) function, and define the port that our server will listen to.
const express=require("express")
const app=express()
const PORT = process.env.PORT || 3000;
The port will be in a separate file and we access it by process.env.PORT.
PORT=8080Set up the route for the request that starts with"/api/v1/domain".
we use app.use()to mount the router that will be defined in"./routes/apiRoute"
The apiRoute file will be created later on.
app.use("/api/v1/domain",require("./routes/apiRoute"))
Start the server and listen to any incoming requests on the specified port.
app.listen(PORT,()=>console.log(`Server is Running on the Port ${PORT}`))
The server.js should look something like this:
const express=require("express")
const app=express()
const PORT=8080
app.use("/api/v1/domain",require("./routes/apiRoute"))
app.listen(PORT,()=>console.log(`Server is Running on the Port ${PORT}`))
Now our server is up and running, let’s create apiController.js file that has a getDomainInfo method that will retrieve the domain info.
first thing first let’s require the necessary modules;
dns is a built-in NodeJs module that resolves domain names to IP addresses and the whois-json is a third-party library that allows us to retrieve WHOIS information in JSON format.
const dns = require("dns");
const whois = require("whois-json");
We define a method called getDomainInfo that takes as a parameter req and res objects
then we extract the domain from the request parameters and store it in the domain variable.
we use dns.lookup method to resolve the domain into an IP address.
If there is an error we return the 400 status code with the error message as JSON.
var data;
const getDomainInfo = async (req, res) => {
  const domain = req.params.domain;
  dns.lookup(domain, (err, address) => {
    if (err) {
      res.status(400).json({
        error: err.message,
      });
    }
    data = { domain, address };
  });
If everything went okay we store the domain and the ip address in the data variable.
Now that we have the IP address we can use the whois-json module to retrieve additional information about the domain.
const results = await whois(`${domain}`);
and return the info as a JSON object like follow:
  res.status(200).json({
    domain: data.domain,
    registrarUrl: results.registrarUrl,
    nameServer: results.nameServer,
    creationDate: results.creationDate,
    updatedDate: results.updatedDate,
    expirationDate: results.registrarRegistrationExpirationDate,
    registrantName: results.registrantName,
    registrantCountry: results.registrantCountry,
    adminName: results.adminName,
    adminPhone: results.adminPhone,
  });
};
defining a welcome method that returns a JSON welcome message to the user.
const welcome = (req, res) => {
  res.status(200).json({
    message:
      "Welcome to the domain name API checker, hit the endpoint /api/v1/domain/ and type your domain name without https:// to get the domain info.",
  });
};
Finally, we export the getDomainInfo and the welcome methods so that we can use them in the router.
module.exports = {
  getDomainInfo,
  welcome

};
the apiController.js file should look like this:
const dns = require("dns");
const whois = require("whois-json");
var data;

const getDomainInfo = async (req, res) => {
  const domain = req.params.domain;
  dns.lookup(domain, (err, address) => {
    if (err) {
      res.status(400).json({
        error: err.message,
      });
    }
    data = { domain, address };
  });

  // whois domain info
  const results = await whois(`${domain}`);
  res.status(200).json({
    domain: data.domain,
    ip: data.address,
    registrarUrl: results.registrarUrl,
    nameServer: results.nameServer,
    creationDate: results.creationDate,
    updatedDate: results.updatedDate,
    expirationDate: results.registrarRegistrationExpirationDate,
    registrantName: results.registrantName,
    registrantCountry: results.registrantCountry,
    adminName: results.adminName,
    adminPhone: results.adminPhone,
  });
};

module.exports = {
  getDomainInfo,
  welcome
};
Now let’s work on the route.
In the apiRoute.js file we require getDomainInfo from apiController file, express and create a router instance using express.Router() method.
const express = require("express");
const { getDomainInfo } = require("../controllers/apiController");
const router = express.Router();
Set up a GET route for the endpoint "/api/v1/domain/:domain". When a GET request is made to this endpoint the router will call the getDomainInfo passing in the domain parameter from the request URL.
router.get("/api/v1/domain/:domain", getDomainInfo);the root of the API is a welcome message when a request is made to the root “/” the welcome method gets called.
router.get("/", welcome);The apiRoute.js file should look something like this:
const express = require("express");
const { getDomainInfo, welcome } = require("../controllers/apiController");
const router = express.Router();

router.get("/api/v1/domain/:domain", getDomainInfo);
router.get("/", welcome);
module.exports = router;
to test our API we run:
node server
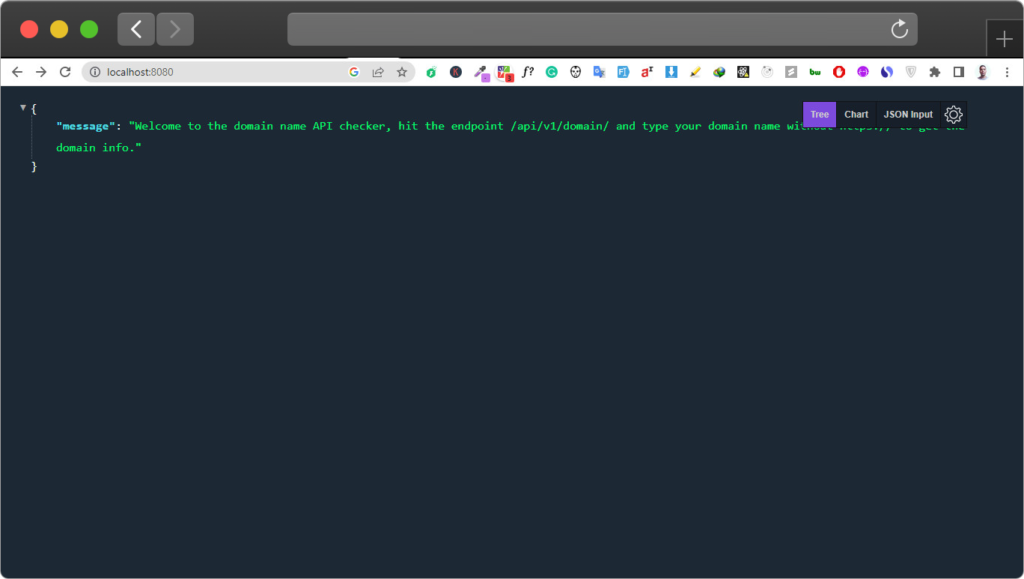
and go to our browser and type:http://localhost:8080
you should see something like this.
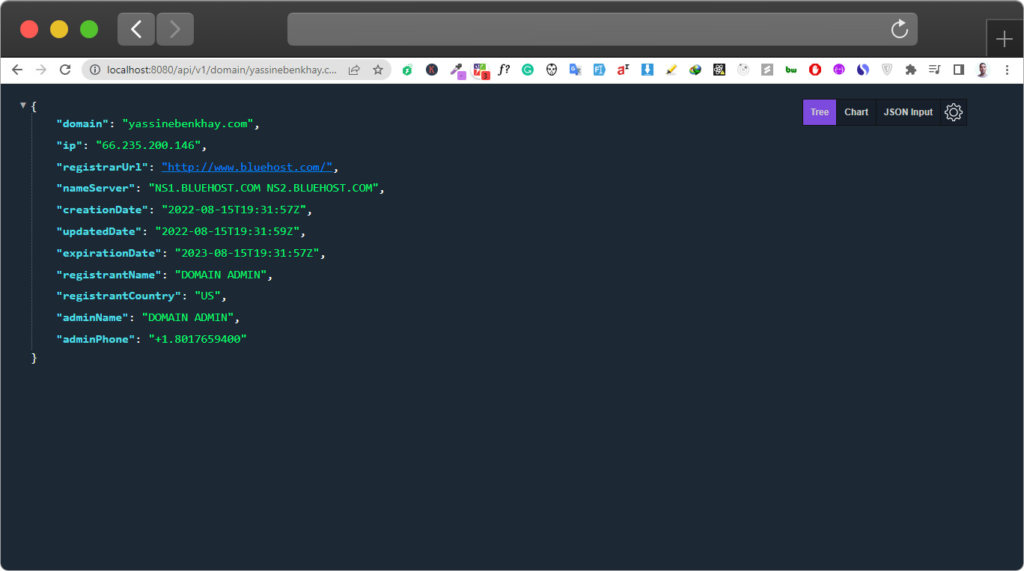
Let’s say that we want to get information about my domain name yassinebenkhay.com we hit the endpoint :http://localhost:8080/api/v1/domain/yassinebenkhay.com and we should see the information below:
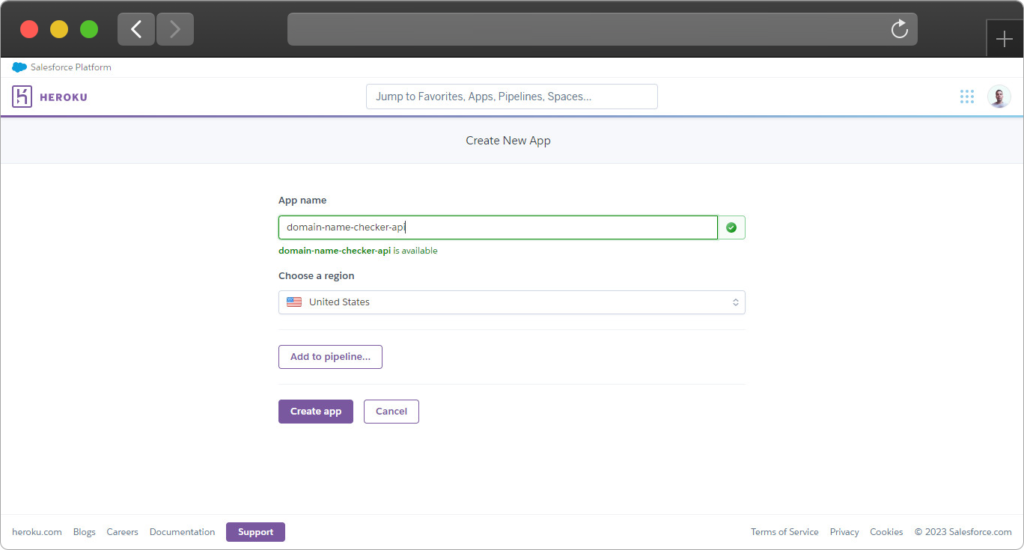
The final step is to deploy this API to a hosting service, I think the easiest way to do so is with Heroku, so let’s go with that.
In your Heroku account create a new app like this:
now we need to push the project from our local machine to GitHub.
in your GitHub account create a new repo and push the project to it.
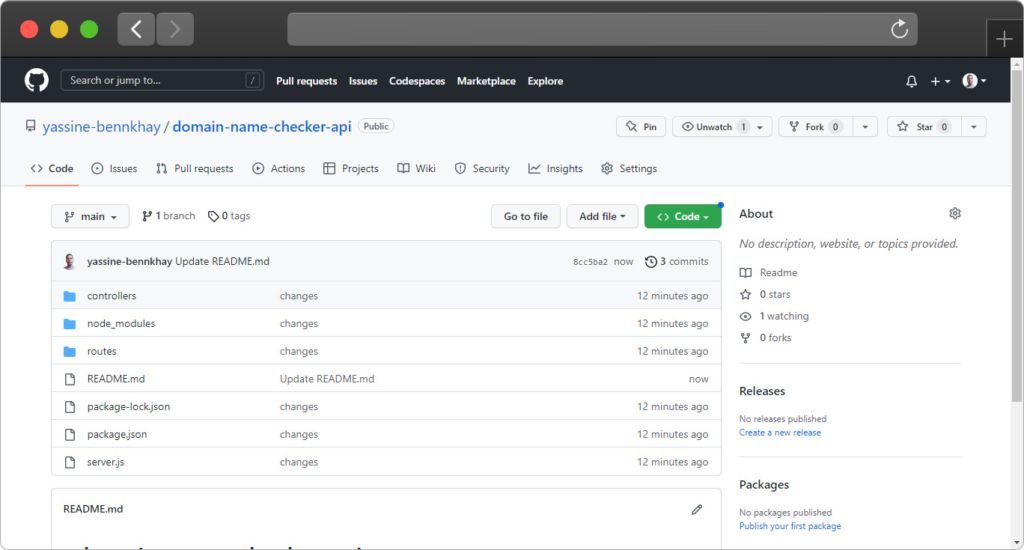
Don’t remove node_modules when you upload the project to the repo, otherwise, the API won’t work once we link the repo with Heroku.
Also, you need to add the node js version in your package.json file in order for Heroku to download it.
 ...
 "engines": {
    "node": "v16.x"
  }
now go to Heroku and like the repo, with the app, we have just created.
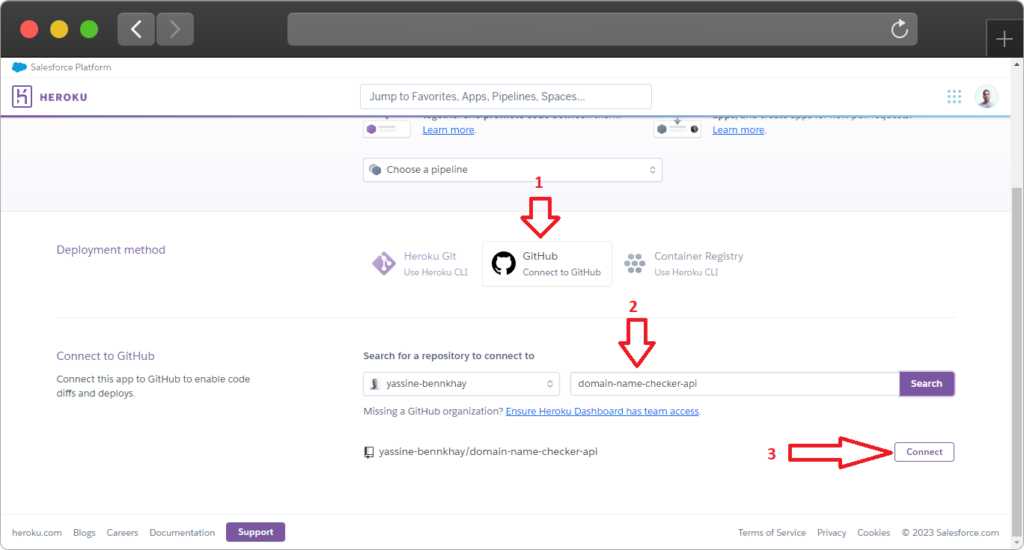
After the repo and the app are linked click deploy as shown below:
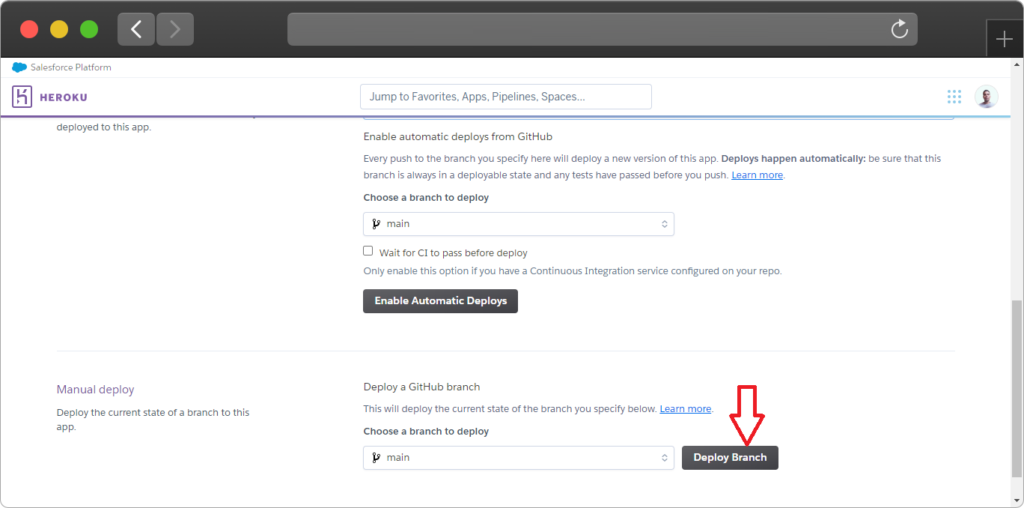
Wait for the process to finish, If everything went well you will have your API link just like this:
https://domain-name-checker-api-production.up.railway.app
I hope that this Tutorial was helpful, if you have any suggestions please consider dropping them in the comments section below.
